Step 1: Create and Edit a Constraint Object
Welcome to this new tutorial series on the use of custom constraints. An electric constraint object (ECSNTR) refers to a custom-defined constraint integral to optimization algorithms, ensuring an accurate representation of limitations in the electric power system within a production cost model. In this tutorial, you will learn how to create and edit the properties a constraint object. The network used in this tutorial is the electric network ENET09_13 available in the sub-folder .\Energy Markets\ENET09_13 of the folder Tutorials.
1. Create a new constraint object
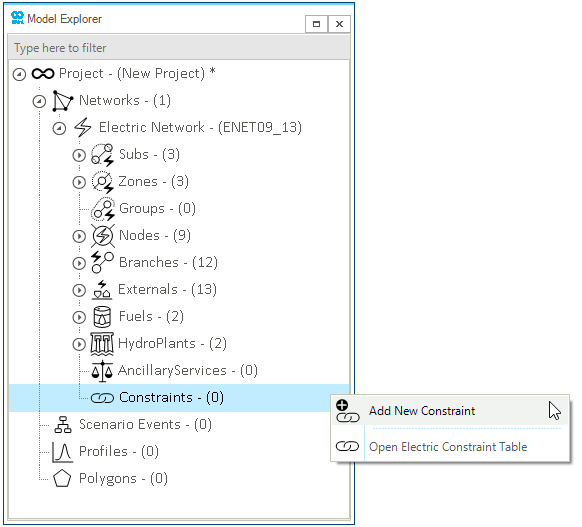
Start by opening SAInt and loading the electric network ENET09_13. This network already includes a PV object called PV.SOLARPARK and an electric storage object called ESTR.BATTERY, both located at NODE9. You will create a custom constraint to ensure the battery only charges from the solar park. Start by accessing the Model Explorer and right-click on the "Constraints" section. From the context menu, select [add New Constraint], as shown in Figure 1. This will automatically open display the Property Editor of the new constraint object, which can be found in the model explorer under the Constraint section.
2. Edit the constraint properties
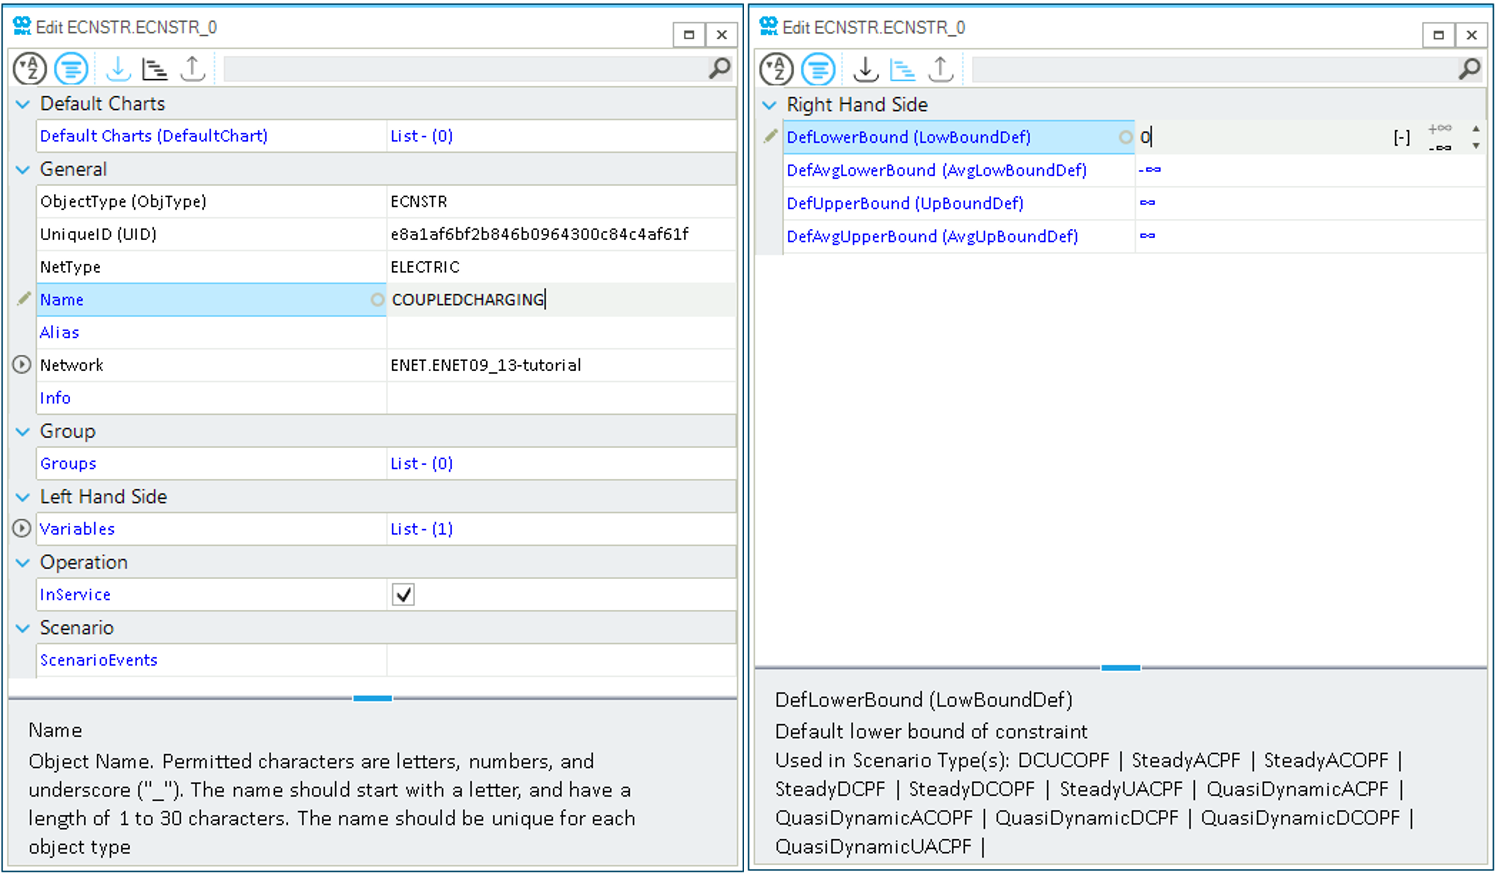
The property Editor allows to define the Input and Event constraint properties. Edit the following properties, as shown in Figure 2:
-
Name: Modify the constraint’s name to "COUPLEDCHARGING". -
LowBoundDef: Define the default lower bound for the constraint. Set the value to "0". -
AvgLowBoundDef: Default time averaged lower bound of the constraint (averaged over each "Time Horizon"). Keep default value of minus infinity. -
UpBoundDef: Default upper bound for the constraint. Keep default value of plus infinity. -
AvgUpBoundDef: Default time averaged upper bound of the constraint (averaged over each "Time Horizon"). Keep default value of plus infinity.
|
The properties |
3. Add new variables to the electric constraint object
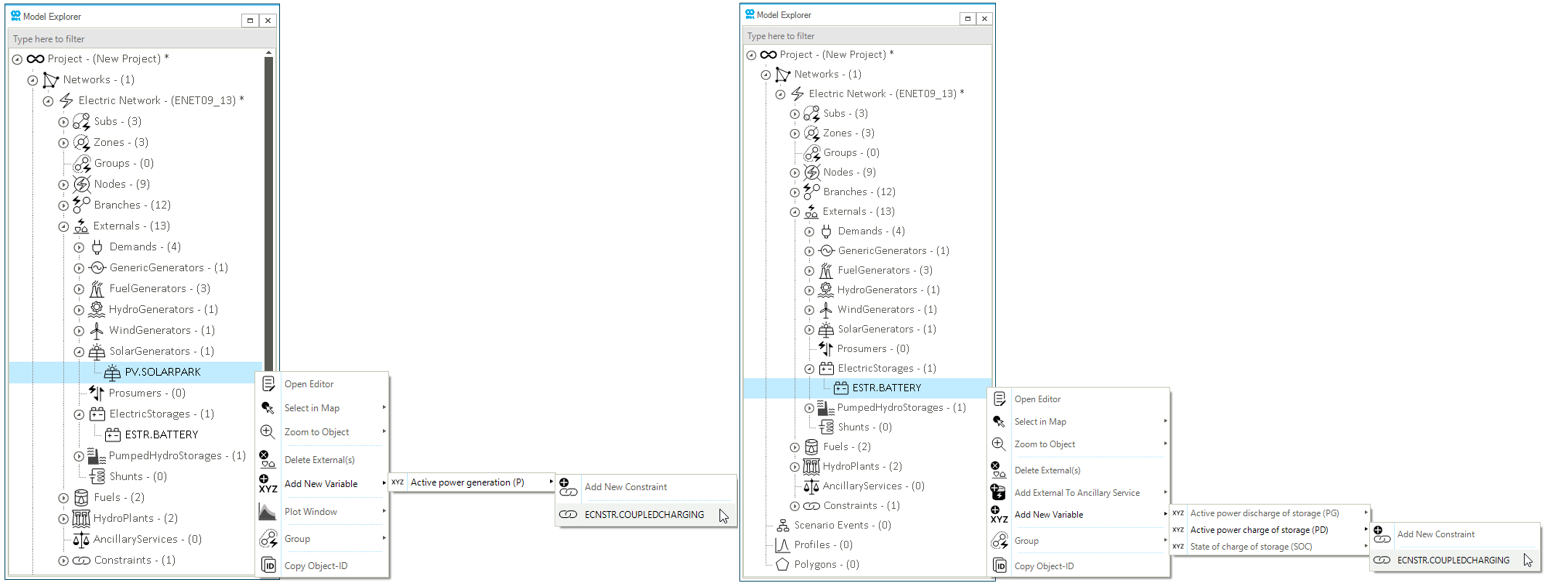
Once the properties of the electric constraint object are defined, you can add new variable objects associated to the constraint. In this case we will add two variable objects to the ECNSTR.COUPLEDCHARGING constraint: one for the solar generator PV.SOLARPARK and one for the ESTR.BATTERY. To add a new variable, access the Model Explorer and right-click on the PV.SOLARPARK object, as shown in Figure 3 (left). From the context menu, select . Repeat the same procedure for the ESTR.BATTERY object and add a new variable, as shown in Figure 3 (right).
4. Edit the new variables properties
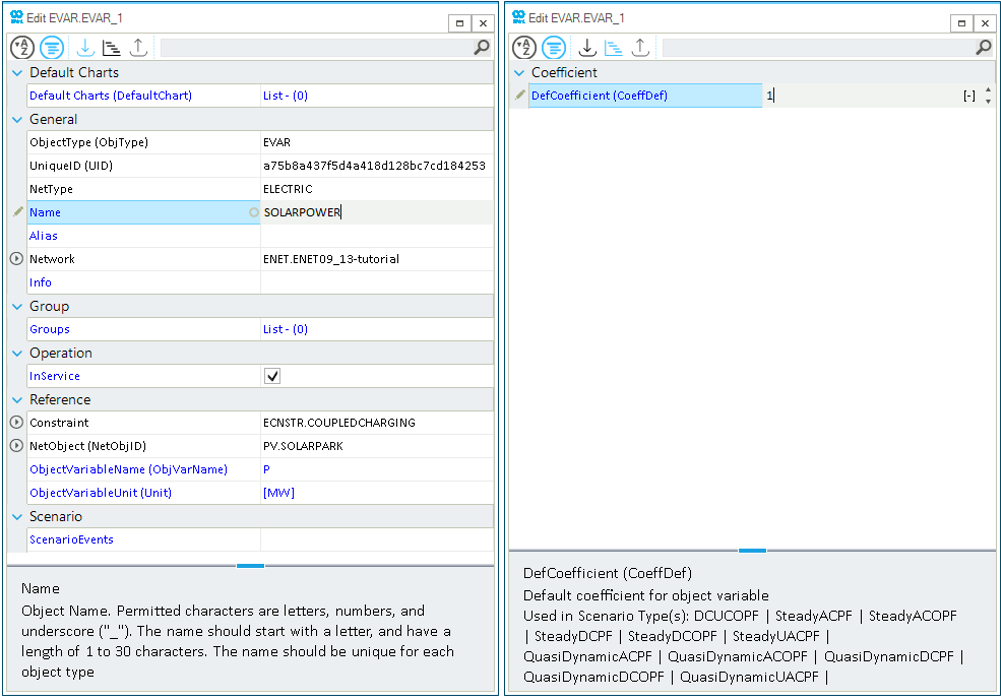
After adding new variables to the ECNSTR.COUPLEDCHARGING constraint, the Property Editor will open automatically. In the next step, you will edit the properties of the variables, starting with the variable assigned to the PV.SOLARPARK object. Access the Property Editor and make sure that the values for the following properties matches (Figure 4):
-
Name: Modify the name of the variable to "SOLARPOWER". -
NETObjID: Network object the variable is referring to. In this case we have PV.SOLARPARK. -
ObjVarName: Name of object variable. We have selected theActive power generation (P)of the PV.SOLARPARK object. -
Unit: Unit for object variable. We can set[MW]. -
CoeffDef: Edit the default coefficient for object variable and set a value of 1.
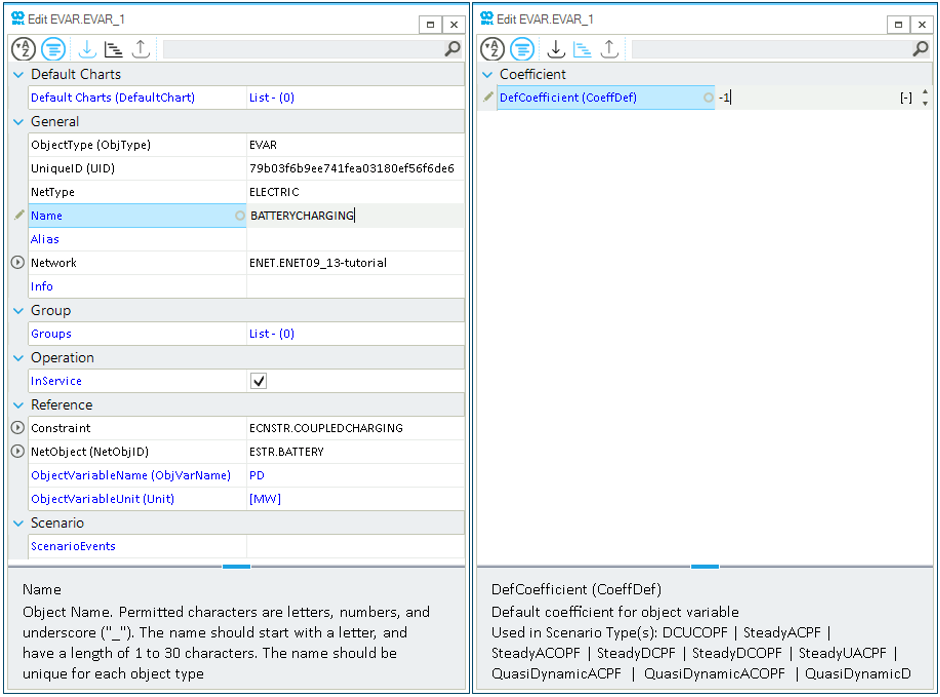
You can use the same procedure to edit the variable assigned to the ESTR.BATTERY object as follows:
-
Name: Modify the name of the variable to "BATTERYCHARGING". -
NETObjID: Network object the variable is referring to. In this case we have ESTR.BATTERY. -
ObjVarName: Name of object variable. We have selected theActive power charge of storage (PD)of the ESTR.BATTERY object. -
Unit: Unit for object variable. We can set[MW]. -
CoeffDef: Edit the default coefficient for object variable and set a value of -1.
|
Note that the coefficient -1 is for the charging. |
Now that you have defined the constraint’s properties and variables, we can interpret the new constraint in the following mathematical formulation (for every time step) (for details see "Electric constraint (ECNSTR)"):
ECNSTR.COUPLEDCHARGING.LowBound ≤ EVAR.SOLARPOWER.Coeff * PV.SOLARFARM.P + EVAR.BATTERYCHARGING.Coeff * ESTR.BATTERY.PD
the remaining properties of the constraint are not relevant as they use the default values.
In a more simple form, as:
0 ≤ PV.SOLARFARM.P - ESTR.BATTERY.PD