Step 3: Add External Objects
The final step in creating the tutorial thermal network model is to add external objects. External objects in SAInt are used to inject or extract energy from a node. This step will focus on creating the heat supply and heat demand externals for the implemented thermal system. The objective is to learn multiple methods to create external objects and define their properties. Future tutorials will explain in detail how these properties affect the behavior of the different externals.
|
Each external object must be assigned to a node object within the network, and there are no restrictions on the number of externals assigned to a node. |
|
Remember, properties for a node will affect all the externals associated with the node. |
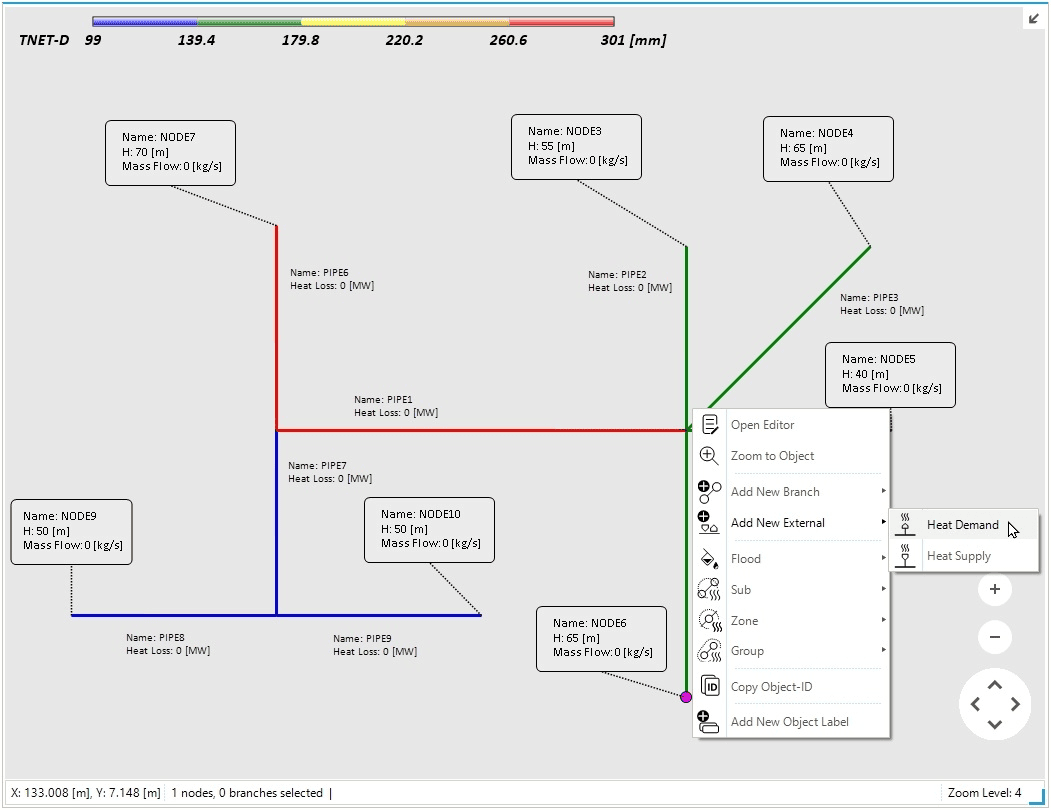
1. Add a heat supply point via the map window
Externals can be added to a network in multiple ways, starting with the map window. Select or hover over NODE6, right-click, and use the option from the context menu, as shown in Figure 1. Once selected, the property editor will appear, allowing the editing of the properties of the newly added supply object. Name the new external HSUPPLY6. In the section "Event Properties" of the property editor change TMINDEF to 5 °C, TMAXDEF to 90 °C, and leave the rest of the properties with the default values. Add another heat supply external at NODE7. Rename the external as HSUPPLY7 and change the property TMINDEF to 5 and TMAXDEF to 90 °C.
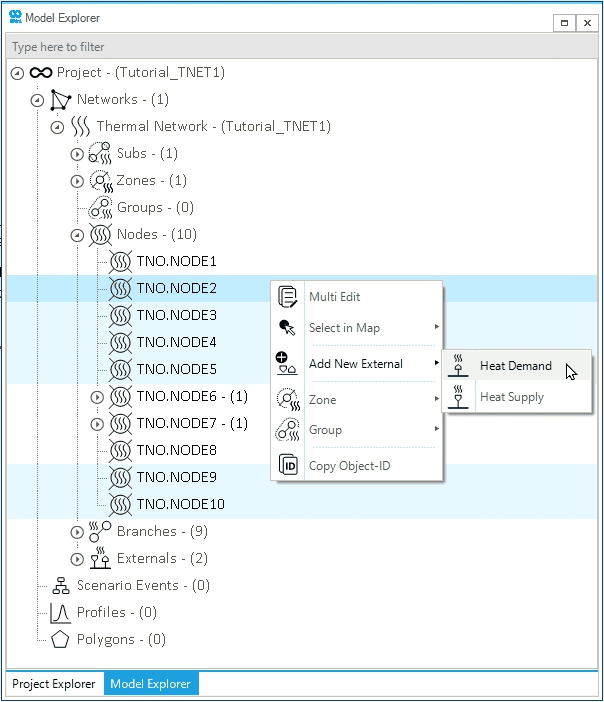
2. Add heat demand points via the model explorer
The model explorer on the left side of the screen can also be used to add external objects. Right-click on NODE3 in the model explorer and select as in Figure 2. Change the property Name to HDEMAND3 and leave the rest of the properties with the default values. Add five additional heat demand objects to NODE2, NODE4, NODE5, NODE9, NODE10. Select the nodes - either from the map view or the model explorer - and follow the previous procedures. Name the off-take points HDEMAND2 and HDEMAND4, HDEMAND5, HDEMAND9, HDEMAND10.