Step 1: Create a New Electric Storage Object
This step is the first in your journey to becoming an expert using the SAInt GUI. This tutorial series starts with creating an electric storage object and defining its properties in SAInt. Storage objects are designed to store electricity, allowing for power consumption and distribution flexibility. The network used in this tutorial is the electric network ENET09_13 available in the sub-folder .\Energy Markets\ENET09_13 of the folder Tutorials.
|
An electric storage object (ESTR) must be assigned to a node object within a network, and there are no restrictions on the number of storages or other externals assigned to a node. |
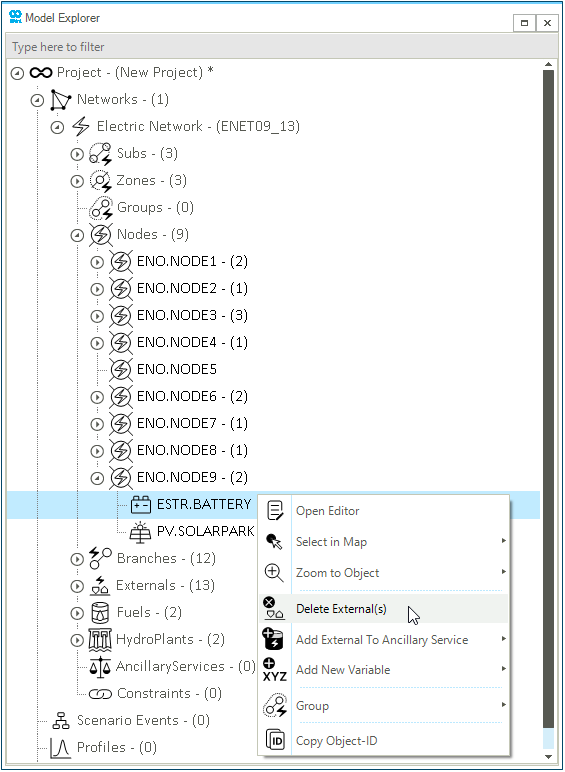
1. Delete an existing electric storage object
Let’s start by opening SAInt and loading the project ENET09_13. The network ENET09_13 already includes an electric storage ESTR.BATTERY connected to NODE9. We will use this network as starting point, and we will delete the existing storage. Go to the model explorer and expand the sections under . Right-click on ESTR.BATTERY and select the option Delete External(s) from the content menu, as shown in Figure 1.
2. Add a new electric storage
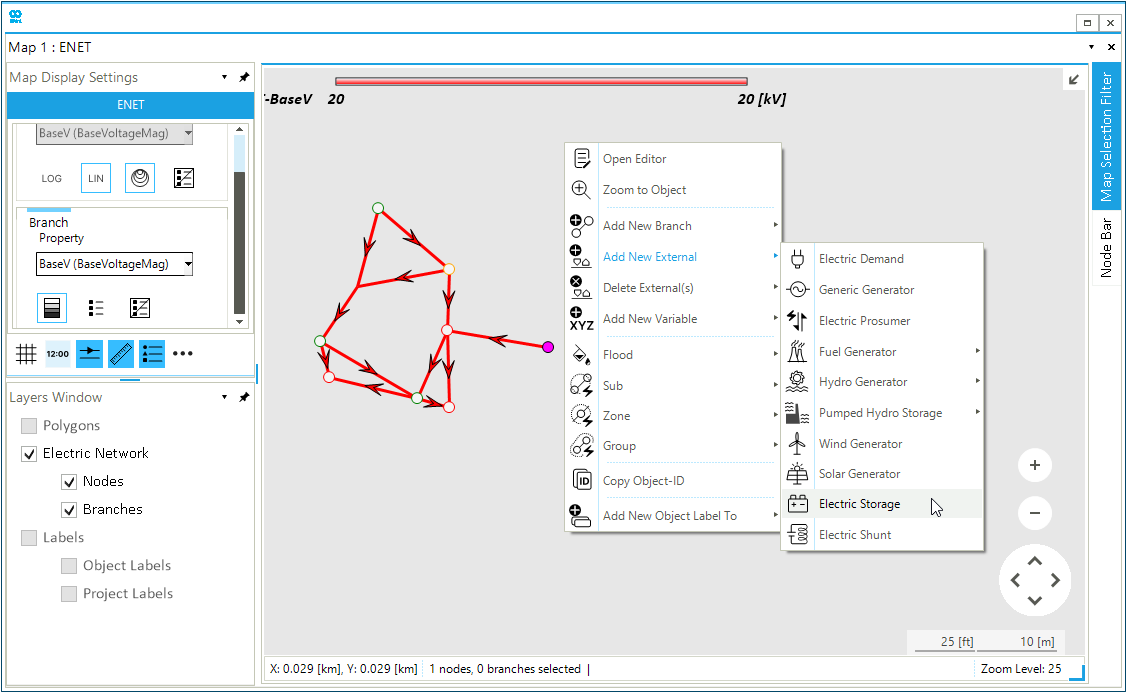
A storage object can be added to a network either directly in the map window or through the model explorer. Select or hoover over NODE9 in the map window, right-click, and then select the option from the context menu to add a new electric storage object, as shown in Figure 2. The property editor will open, allowing you to edit the parameters of the new object.
3. Edit the electric storage properties
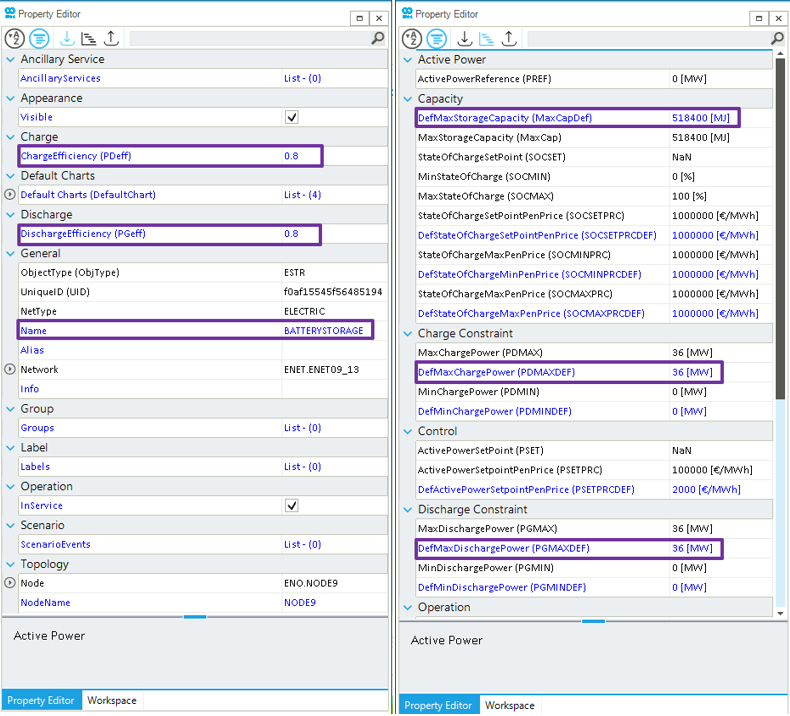
The property editor enables you to edit properties of a selected object. In this step you will edit the relevant properties of the new ESTR object, starting from the input and event properties. In the property editor, click on Input Properties button to access the list of input properties. Modify the following input properties, as shown in Figure 3 (left side):
-
Name: Modify the electric storage name to "BATTERYSTORAGE". -
ChargeEfficiency (PDeff): Edit the efficiency of the storage charging process and set a value of 0.8. -
DischargeEfficiency (PDeff): Edit the efficiency of the storage discharge process and set a value of 0.8.
Click on Event Properties button to access the list of event properties. Change the following event properties as shown in Figure 3 (right side), and leave the rest of the properties with the default values:
-
DefMaxStorageCapacity: Edit the default maximum storage capacity and set a value of 518400 [MJ]. -
DefMaxChargePower: Edit the default maximum charge rate of the storage and set a value of 36 [MW]. -
DefMaxDischargePower: Edit the default maximum discharge rate of the storage and set a value of 36 [MW].
Leave all remaining properties to their default value.
The user can only modify the properties highlighted in blue.
4. Save network data
To save your new tutorial electric network, go to the network tab and select . This will save the network file with the new topology and objects. Alternatively, use the third icon from the left at the very top of the SAInt window. In the next step, you will develop a scenario, add events for the new electric storage and perform a simulation.