Edit the Geometry of a Branch
This guide shows how to edit the geometry and position of nodes and vertices of a branch. The examples refer to a pipeline of a gas network, but the approach is general and valid for any type of branch in SAInt.
1. Change the position of a node in a branch
Select the branch you want to modify in the map view. In this example is the pipeline GPI.GPI_1. In the property editor, scroll down to the section "Topology" (Figure 1 left). Use the button ![]() to visualize the property of the node GNO.GNO_1 (Figure 1 right). By editing the values of the properties
to visualize the property of the node GNO.GNO_1 (Figure 1 right). By editing the values of the properties X ("Long (X)") and Y ("Lat (Y)"), you can change the position of the node.
Alternatively, after selecting only the node and not the branch you are interested in, you can change the same properties from the property editor.
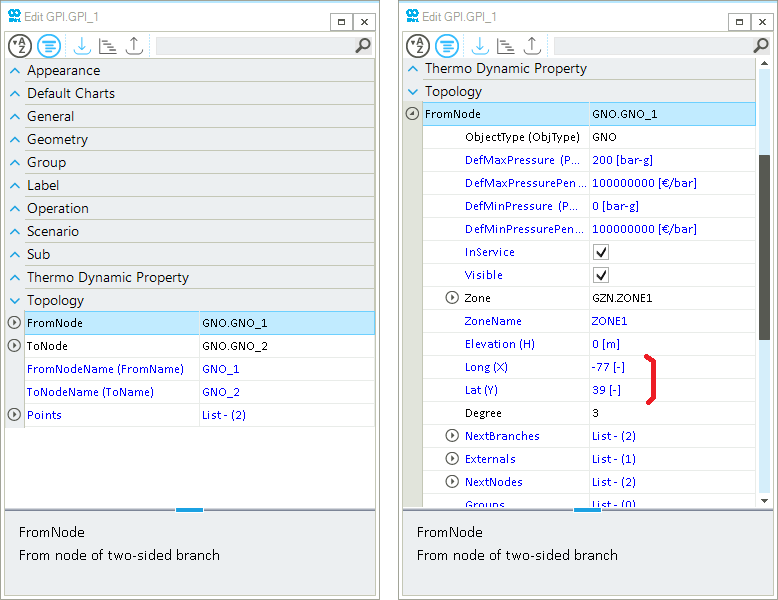
X ("Long (X)") and Y ("Lat (Y)") of the node of interest (right).2. Add a new vertex
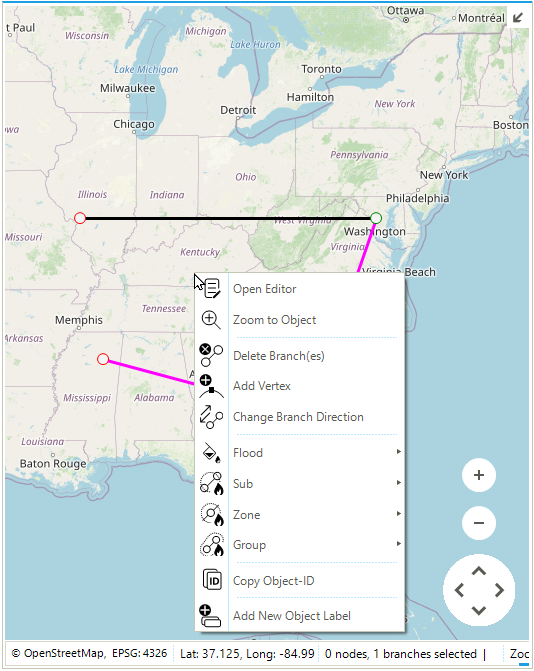
Changing the geometry of an existing branch by adding a new vertex is very easy. Start by selecting the branch of interest. Then, move the cursor to where you want to add a new vertex and right-click. From the context menu select the option "Add Vertex" (Figure 2). To fine-tune the position of the vertex, check the step "Change the position of a vertex".
3. Remove a vertex
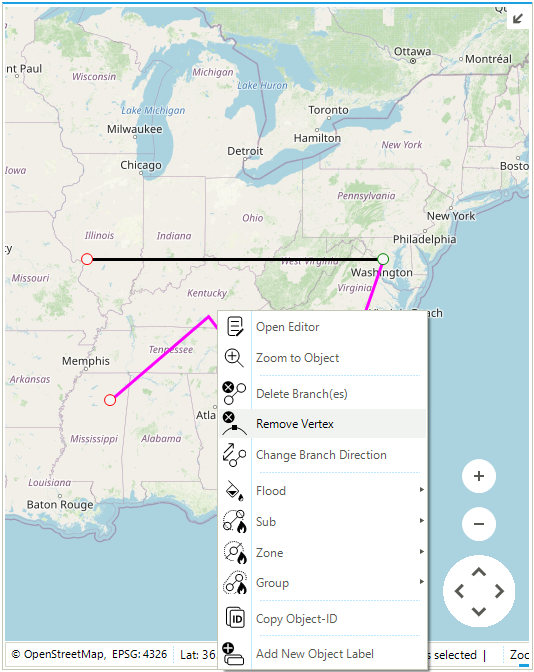
To remove a vertex from a branch, start by selecting the branch you are interested in modifying (Figure 3). With the cursor go near the vertex and right-click. From the context menu select the entry "Remove Vertex".
4. Change the position of a vertex
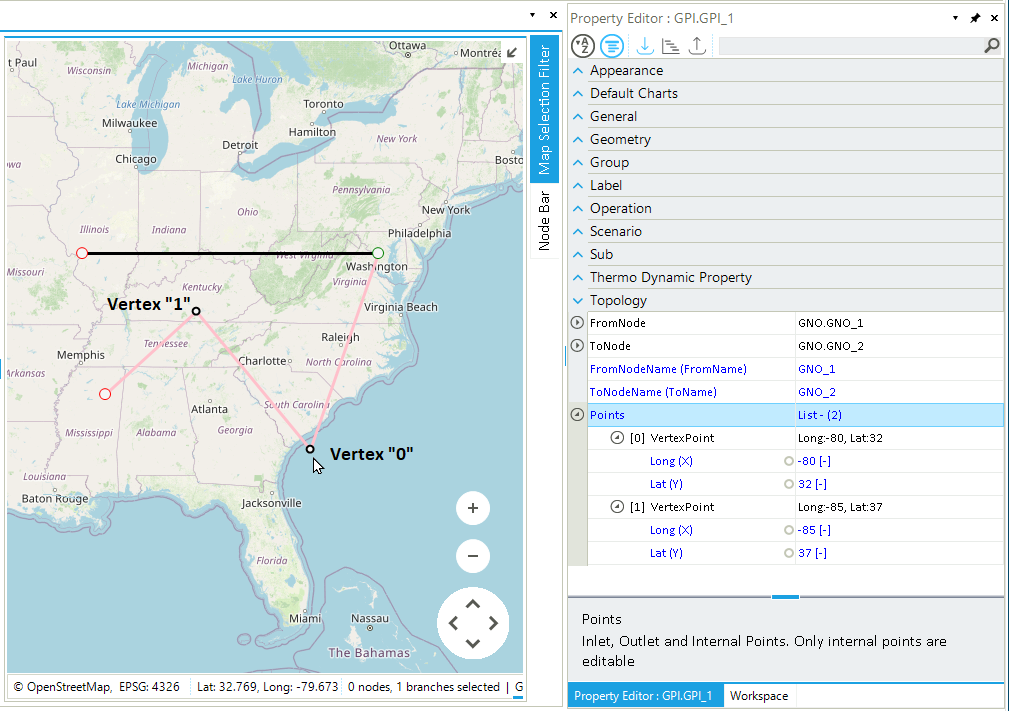
Select the branch you want to modify, and in the property editor navigate to the section "Topology". Use the button ![]() next to "Points" to get the list of all vertices belonging to the branch. Use again the button
next to "Points" to get the list of all vertices belonging to the branch. Use again the button ![]() next to the name of the vertex you want to change to access and modify the values of the properties
next to the name of the vertex you want to change to access and modify the values of the properties X ("Long (X)") and Y ("Lat (Y)") (Figure 4).