Create a fuel and assign it to a fuel generator
In SAInt, a thermal power plant is separated into two network objects: fuel (FUEL) and fuel generator (FGEN). The fuel generator object describes the generation facility, while the fuel represents the feedstock fuel that supplies the production of the fuel generator. A fuel generator can only operate if it is assigned to a fuel. A FGEN cannot be created without being assigned to a FUEL. This guide explains how to create a fuel generator with a fuel object assigned to it. In addition, how to change the fuel assigned to a fuel generator is presented.
This example is valid for AC(O)PF scenarios. A related how-to is limit fuel availability
1. Create a fuel
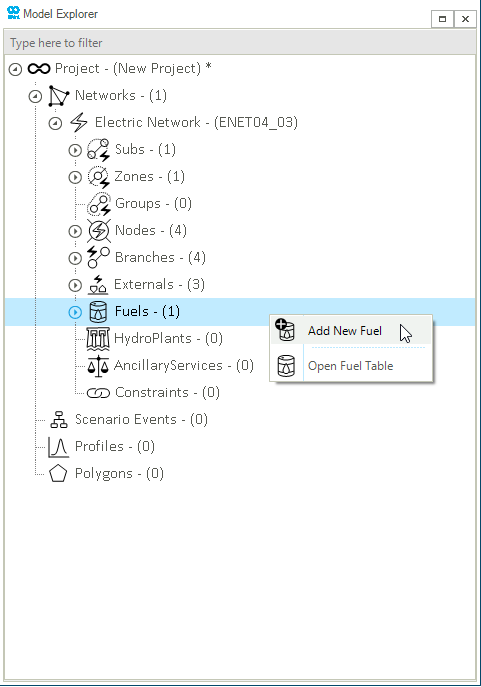
Once a network file is open in the SAInt project environment. A new fuel object can be created by right-clicking in the model explorer on Fuels and selecting Add New Fuel from the context menu, as shown in Figure 1. Once the new fuel is created, the property editor will automatically be prompt and can be used to define the default properties of the fuel object.

|
By changing the unit of the fuel ( |
2. Assign a fuel to a fuel generator
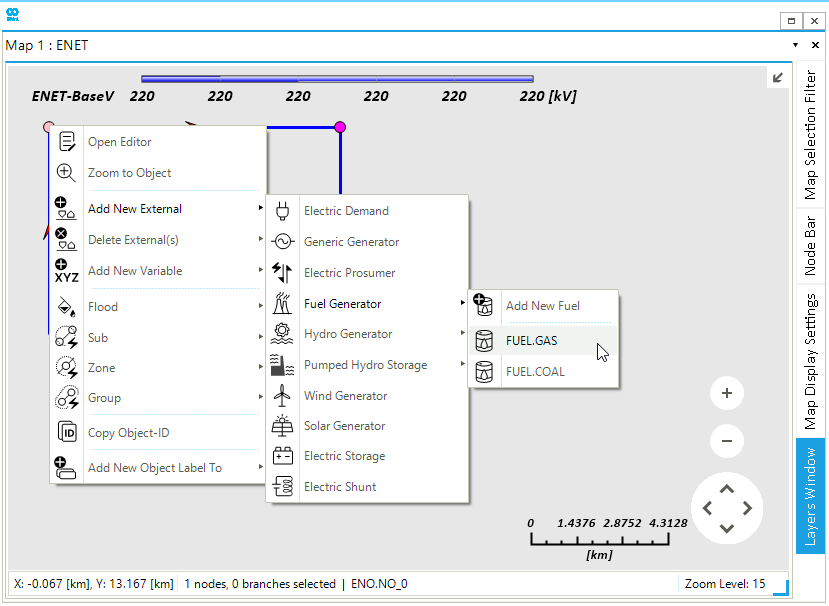
After creating and defining the properties of the fuel, the next step is to create a fuel generator and assign it to a fuel. Right-click on the node in the map window and access to select which fuel will be assigned to the new fuel generator as shown in Figure 2. Assign a previously created FUEL (e.g., Gas or Coal) or create a new one. If no FUEL object was previously created, the only available option is Add New Fuel. By selecting this option a new FUEL object is automatically created and assigned to the FGEN.

3. Change the fuel assigned to a fuel generator
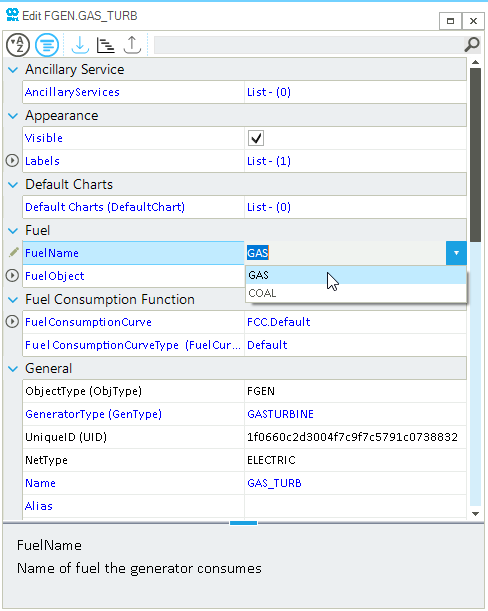
The fuel assigned to a fuel generator is a property and, as such, can be edited via the property editor. Open the property editor of the FGEN and search for the property called FuelName, as shown in Figure 3. Click on ▼ to access the list of fuels, edit the assigned fuel and press Enter.
