Define Network Containers
This guide provides step-by-step instructions on how to define the network containers: zones, groups, and subs. One or multiple objects can be assigned to a container either by creating a new container or by using an existing one. This can be done by using the map window, node explorer, or the model explorer. The procedure is the same for all network types. An electricity network is used for this example.
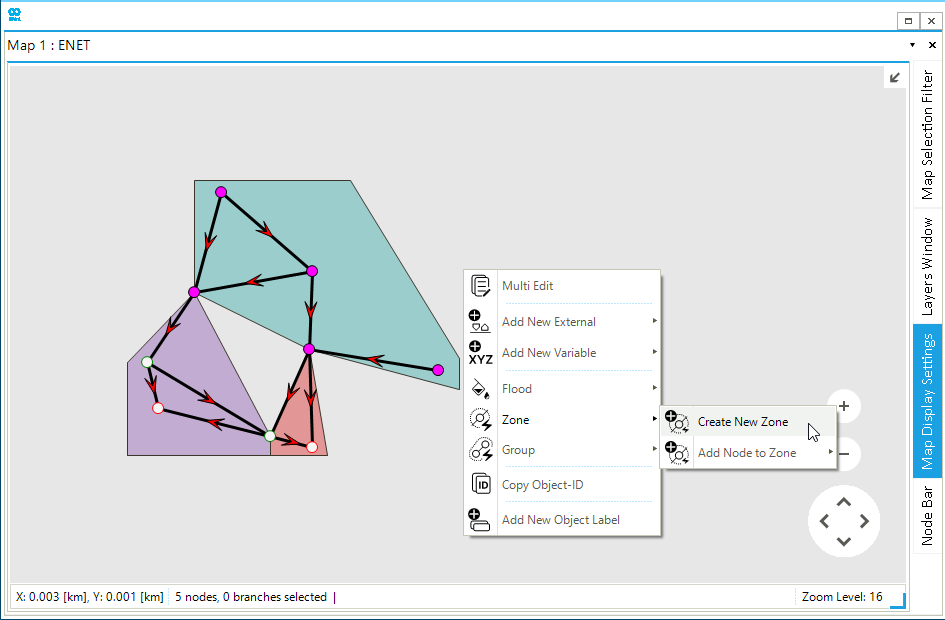
1. Create a zone using the map window
A zone (node-oriented) is a subset of nodes, branches, and externals of a network. In the map window select the desired nodes (holding Shift in case of multiple selections), and right-click anywhere on the map window to access the context menu. Under Zone choose Create New Zone as shown in Figure 1.
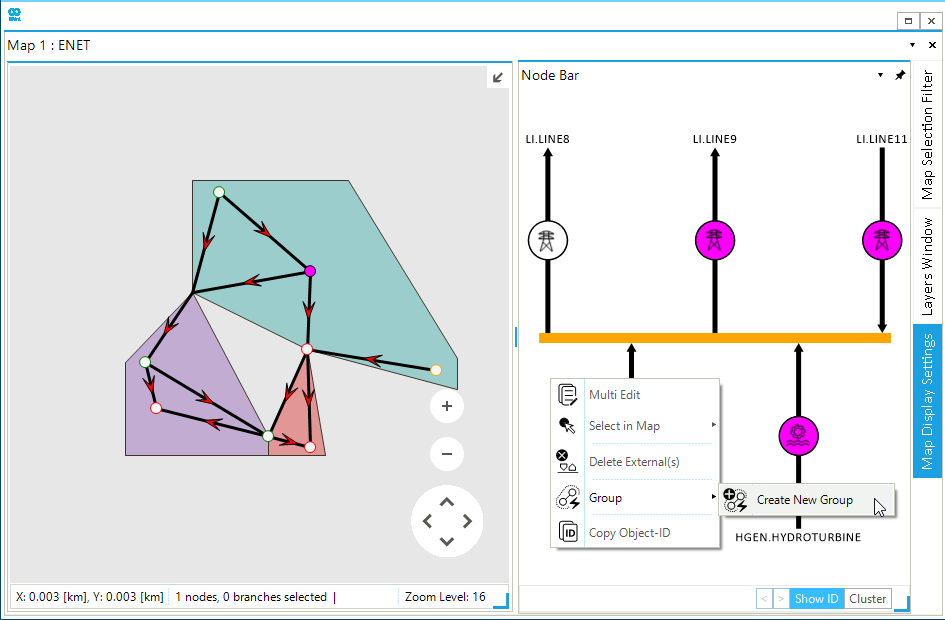
2. Create a group using the node explorer
A group is a subset of any child object types of a network and do not follow any specific assignment rules and are fully customizable by the user. Any child object can be assigned to any number of groups. Open the node explorer, and select one node in the map window to visualize the objects connected to it. Select the desired objects (e.g., three extenals) connected to the node (holding Shift in case of multiple selections), and right-click anywhere on the node explorer to access the context menu. Under the option Group choose Create New Group as shown in Figure 2.
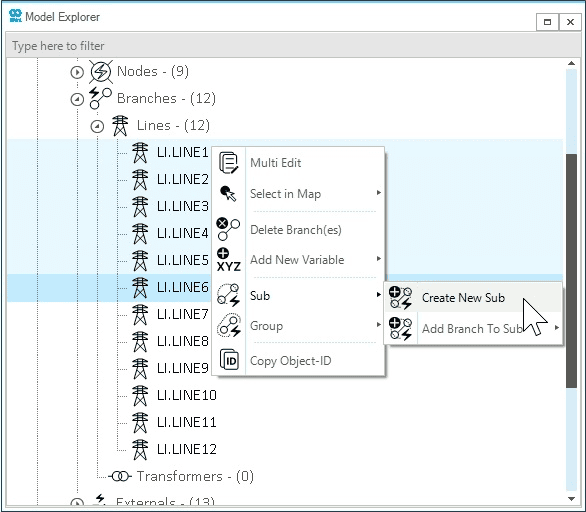
3. Create a sub using the model explorer
A sub (branch-oriented) is a subset of nodes, branches, and externals of a network. In the model explorer select the desired branches (holding Ctrl in case of multiple selections), and right-click on the model explorer to access the context menu. Under the option Sub choose Create New Sub as shown in Figure 3.