Add Labels
This guide provides step-by-step instructions on how to create a label for any object in the map window. The how-to explains the steps to add labels at the node, branch, network, and map view levels. Steps are described using a gas network. However the same methods apply to all energy network types or hub systems in SAInt-GUI and to both geographic and Cartesian map views.
|
The properties of an object displayed on a label are based on the display time of the map window (i.e., the active time step) and on the availability of a valid solution. If a solution for the active scenario is not available, default values are reported for the selected properties. |
1. Create a label for a node or external
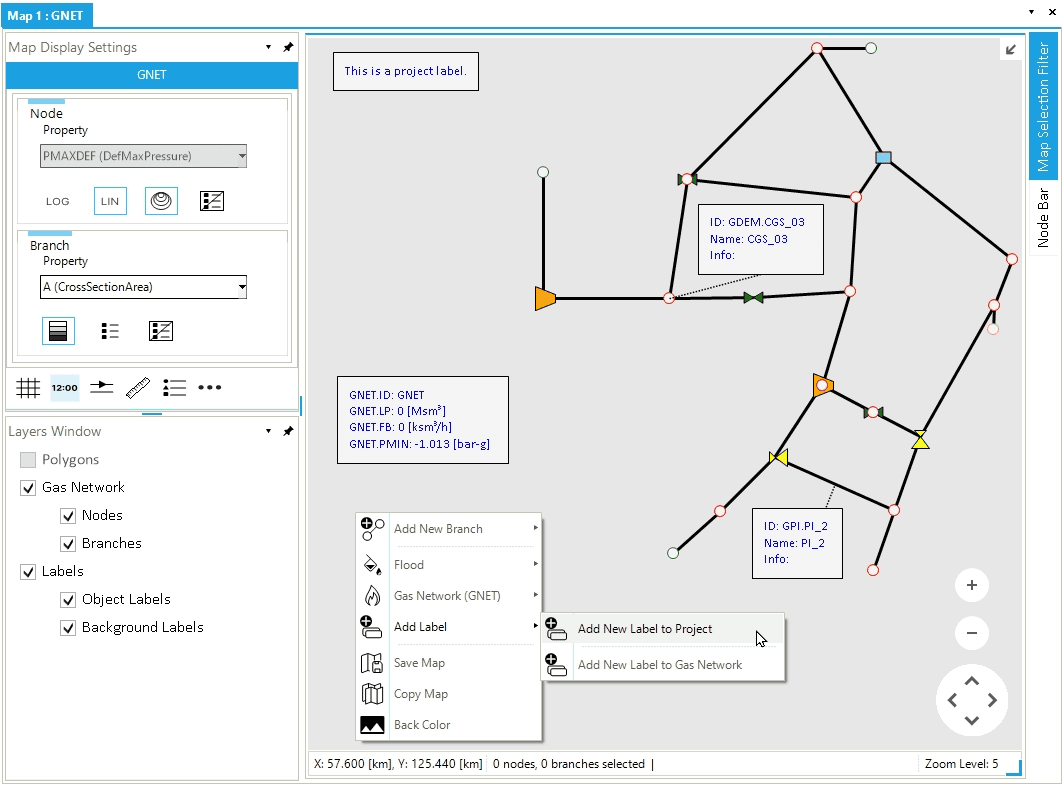
Select the node you want to add a label to on the map window and right-click to access the context menu. Choose Add New Object Label To and select the node or the external connected to the node. In this example, the demand GDEM.CGS_03 is selected, as shown in Figure 1.

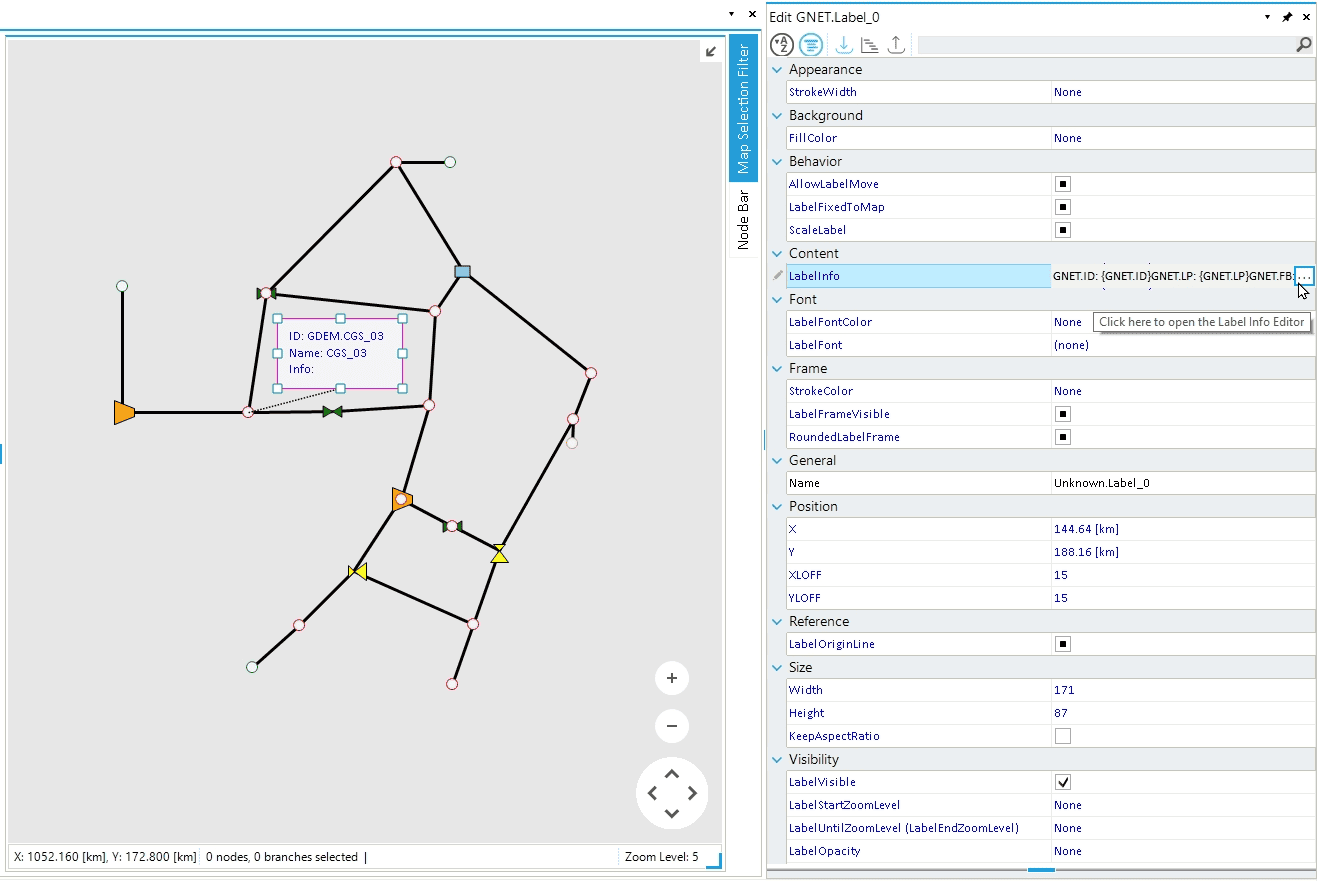
By default, the label contains the ID, Name and Info properties. Select the label to access the property editor. Once selected, the label is highlighted with a magenta color. The list of displayed properties in the label can be edited using the LabelInfo property as shown in Figure 2.
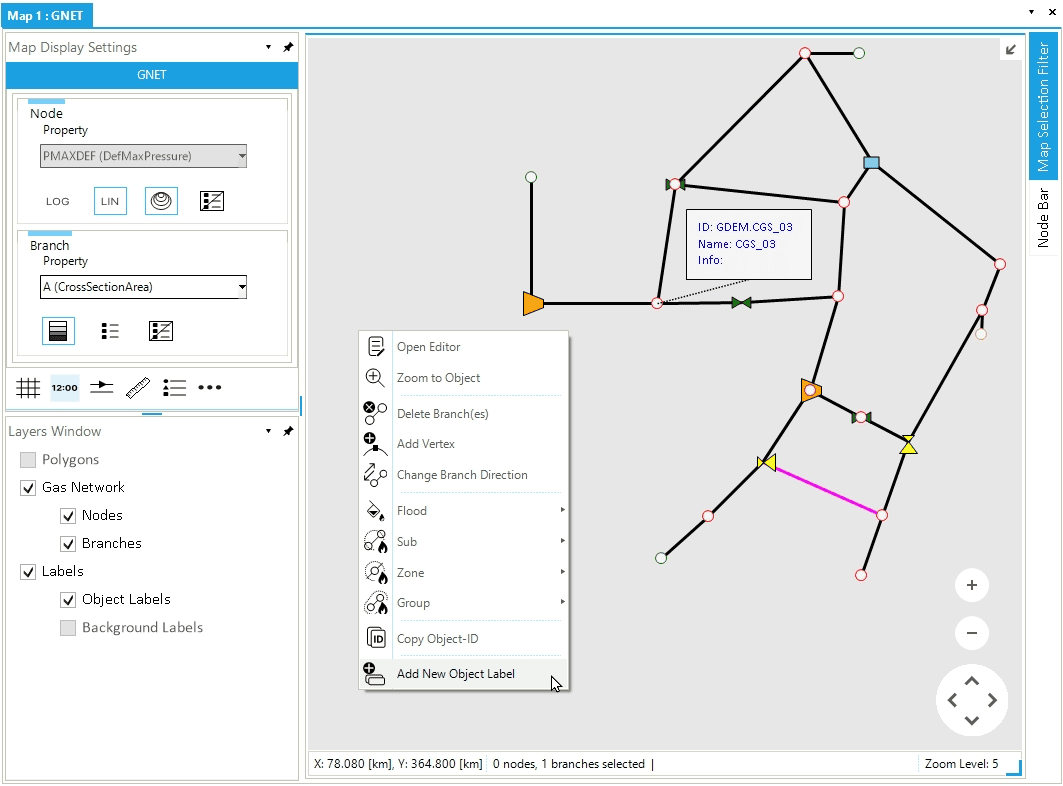
2. Create a label for a branch
Similarly to a node or external object, after selecting the branch right-click on the map window to access the context menu. Use the Add New Object Label as shown in Figure 3, to add the default label for the selected branch.
3. Create a label for a network or a project
In addition to object labels, labels can be created for a network or a project. As object labels, network labels can mix network’s properties and text. On the other hand, a project label can only accept text and it is displayed even when there is no loaded network.
To add a project or network label, no object should be selected in the map window. Press Esc to ensure that no object is selected. Right-click anywhere on the map window to access the context menu (Figure 4), and select or . The context menu option changes with the type of loaded network. A default project or network label is added like in Figure 4 (top-left for the project and middle-left for the network).