Create and Delete a Gas Storage
This guide provides step-by-step instructions on how to add and delete gas storage externals.
For more information on how to edit properties of a gas storage refer to Define Properties of a Gas Storage.
1. Create a gas storage
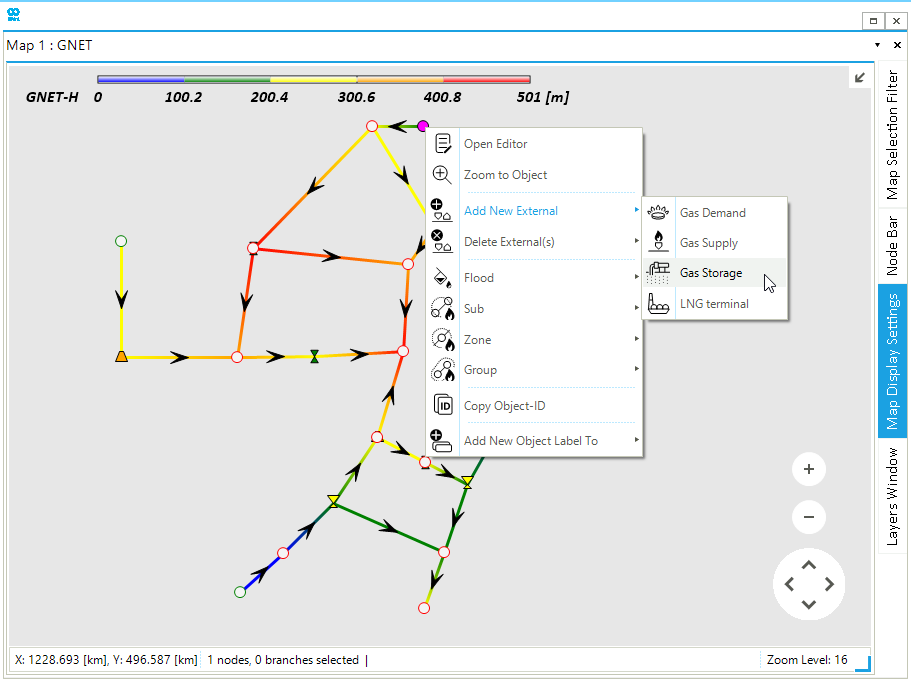
Select the node where to assign the gas storage and right-click on the background of the map window. From the context menu, select (Figure 1). The property editor window for the new gas storage object opens automatically, and a new GSTR object is added to the list of storage externals in the model explorer.
2. Delete a gas storage
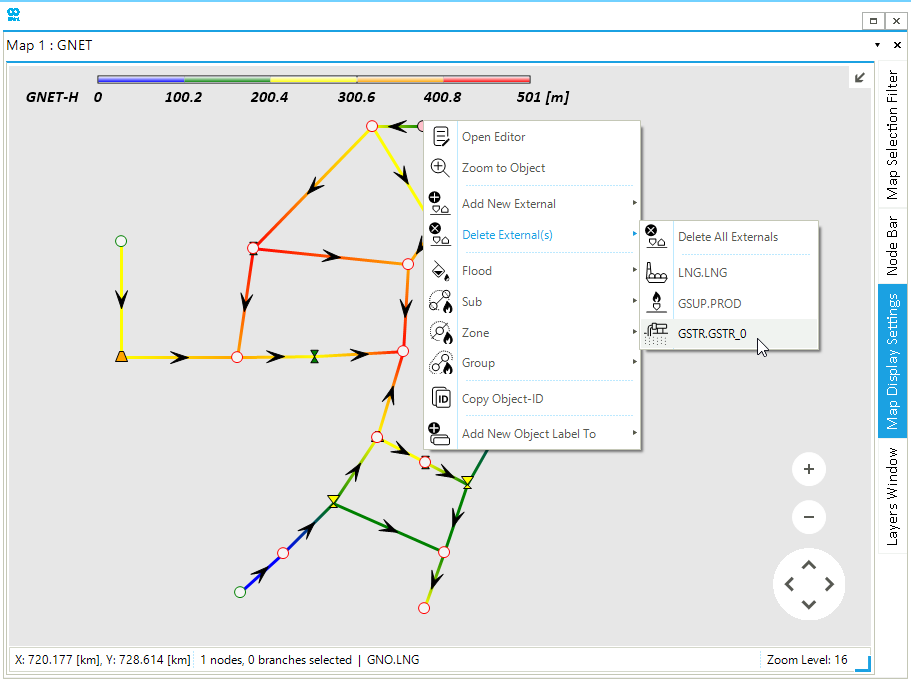
There are different possible ways to delete a gas storage object. It is possible to select the node of the network where the object is associated from the map window (Figure 2) and, after right-clicking, use from the context menu. Or, after selecting the node, use the node bar and choose the object. Again, after right-clicking select Delete External(s) from the context menu.
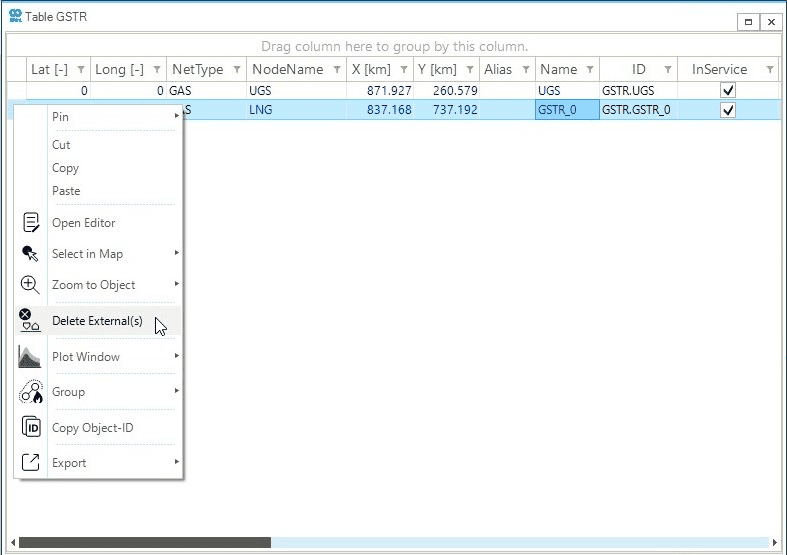
Alternatively, use the model explorer and select the object from the ones in the list under . From the context menu, select Delete External(s). Finally, open the "Table GSTR" from the table tab and select the row associated with the gas storage of interest (Figure 3). Right-click to open the context menu and select Delete External(s).