Add and Evaluate a Condition for an Event
Conditions are powerful tools allowing the implementation of feedback and what-if logic in a simulation. This guide demonstrates the basics of how to add a condition to an event and how to change the way a condition is evaluated.
For more details on conditions see section Conditions of the Reference guide.
1. Add a condition
Conditions are an extra layer of logic you can build on top of events in a dynamic simulation scenario. Start by selecting an event in the event table of the active scenario. You can either type directly your new condition in the Condition column, after clicking one time on the cell (Figure 1 top), or in the Condition row of the section Condition of the Property Editor (Figure 1 bottom).
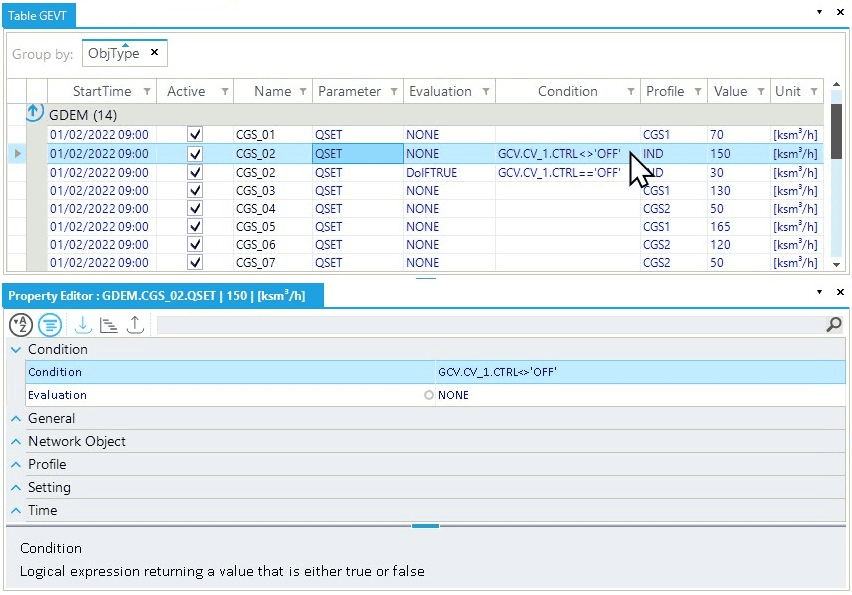
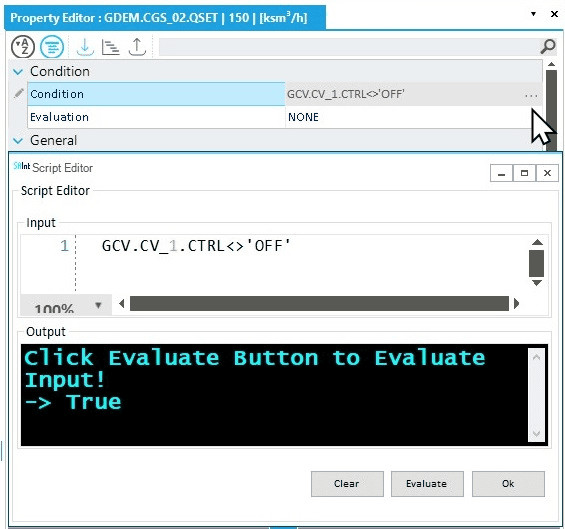
Condition or in the dedicated section of the Property Editor after selecting the event.In both cases, you need to be sure of the correct syntax of the condition. SAInt performs a syntax check, and the expression will be in red if it fails to pass. Alternatively, in the Property Editor click in the cell where you write the expression and open the Script Editor by clicking the three dots on the right of the cell. The Script Editor allows writing an expression and checking if it is correctly interpreted and evaluated (Figure 2). Just use the button Evaluate.
2. Add the evaluation rule
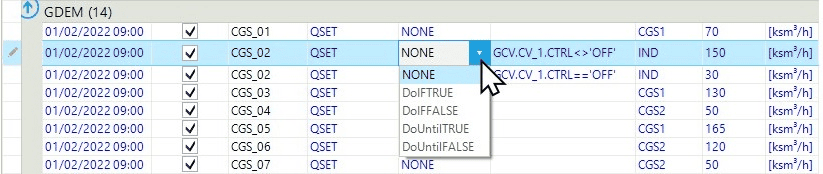
After defining the content of your expression, it is necessary to specify how SAInt will use the expression. Each expression needs an "evaluation rule", and the user can choose among NONE (the default), DoIFTRUE, DoIFFALSE, DoUntilTRUE, and DoUntilFALSE.
You can select the rule by using the drop-down list from the cell of the column Evaluation of the table of events or the Evaluation row of the section Condition of the Property Editor (Figure 1 bottom), or from the event table using the drop down list tool in the column Evaluation (Figure 3).
Evaluation column in the events table.3. Expressions and simulation time
When it is necessary to restrict the assessment of a condition to a certain period of the simulation, it is possible to combine the condition with the gtime function. The built-in function gtime explicitly incorporates the active simulation time step in the statement and it allows to extend the statement to be evaluated to be time aware.
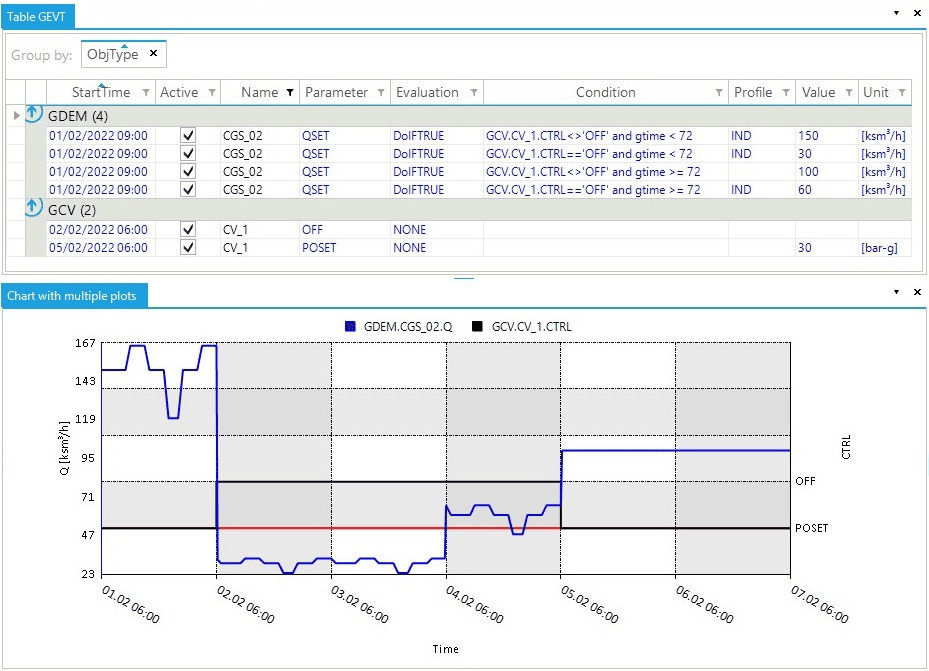
Figure 4 (top) shows an example of a set of events for the gas demand object CGS_02. All events start at the same time. Their expressions are composed of two parts. One side checks the status of the control valve CV_1. The other side checks if the time step is before or after the time 04.02 06:00 (i.e., 72 hours is equivalent to 06:00 a.m. of February 4).
All expressions use the evaluation rule DoIFTRUE. The resulting demand dynamic is described in the chart at the bottom of Figure 4.
The control valve CV_1 starts with control mode set on POSET, it is switched off at 06:00 a.m. of February 2, and goes back to POSET at 06:00 a.m. of February 6.
After 09:00 a.m. on February 1, the gas demand CGS_02 must respect these conditions (all evaluated with a DoIFTRUE):
-
if the time is before
04.02 06:00and:-
the valve is not
OFF: the demand is 150 ksm3/h times the profile IND; -
the valve is
OFF: the demand is 30 ksm3/h times the profile IND;
-
-
if the time is equal of after
04.02 06:00and:-
the valve is not
OFF: the demand is 100 ksm3/h; -
the valve is
OFF: the demand is 60 ksm3/h times the profile IND;
-
The blue line in Figure 4 shows this behavior of the gas demand CGS_02.
|
The example in Figure 4 is to showcase the use of |